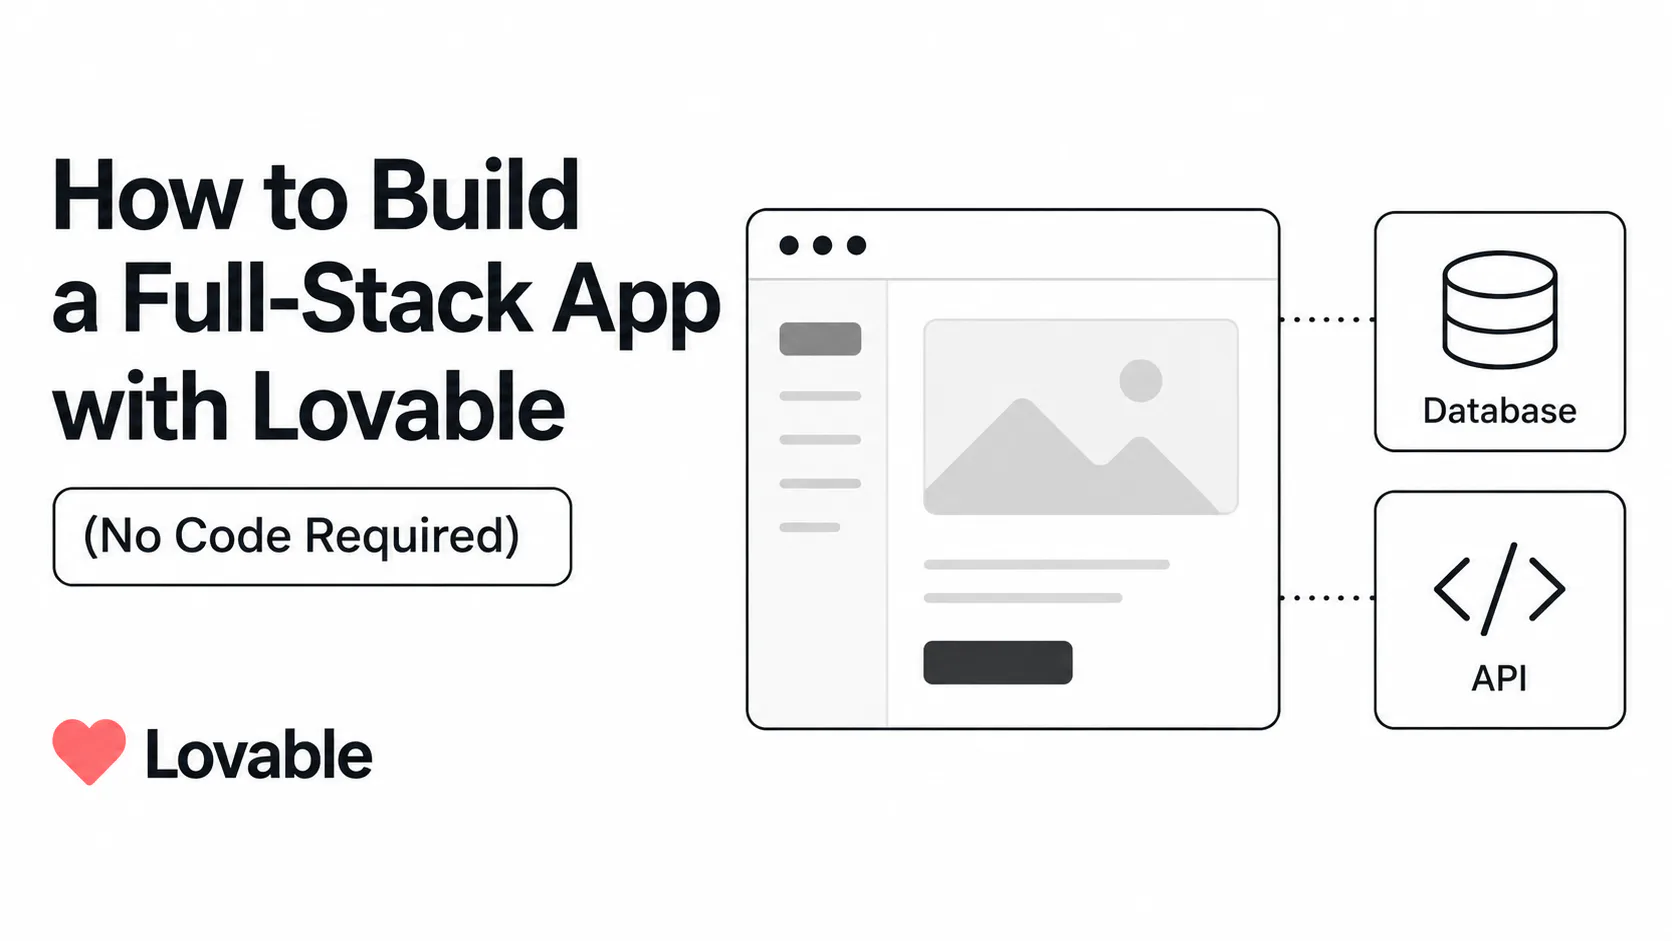
How to Build a Full-Stack App with Lovable (No Code Required)
Step-by-step guide to building and deploying a full-stack web app with Lovable in 2026. Covers Agent Mode, Supabase, auth, payments, and security.
Most app ideas die at the same moment: when the person who has the idea realizes they can't build it themselves, and hiring someone to build it costs $15,000 and three months of back-and-forth.
Lovable changes that equation. You describe what you want in plain English. Lovable generates a full-stack React application - with a real database, authentication, and a live URL - in minutes. Sabrine Matos used it to build a women's safety app from scratch, with no engineering degree, and reached $456,000 in annual recurring revenue.
This tutorial walks through exactly how Lovable works, how to get a production-worthy app running, and what you need to know about security before you go live with real users.
TL;DR: Lovable generates complete React + Supabase web apps from plain-English prompts, with one-click deployment. The fastest path from idea to live URL for non-technical founders. Read the security section before handling real user data.
What Lovable actually builds
Before touching the product, it helps to understand what Lovable produces - because "full-stack app" means different things in different contexts.
When Lovable generates an application, you get:
- Frontend: React components styled with Tailwind CSS and shadcn/ui - the same component library professional developers use for production interfaces
- Backend: A PostgreSQL database provisioned through Supabase, with auto-generated schemas based on your description
- Authentication: Email/password and social login flows, scaffolded automatically when you mention user accounts in your prompt
- Payments: Stripe checkout flows, webhook handling, and the database tables to go with them - described in plain English and generated as working code
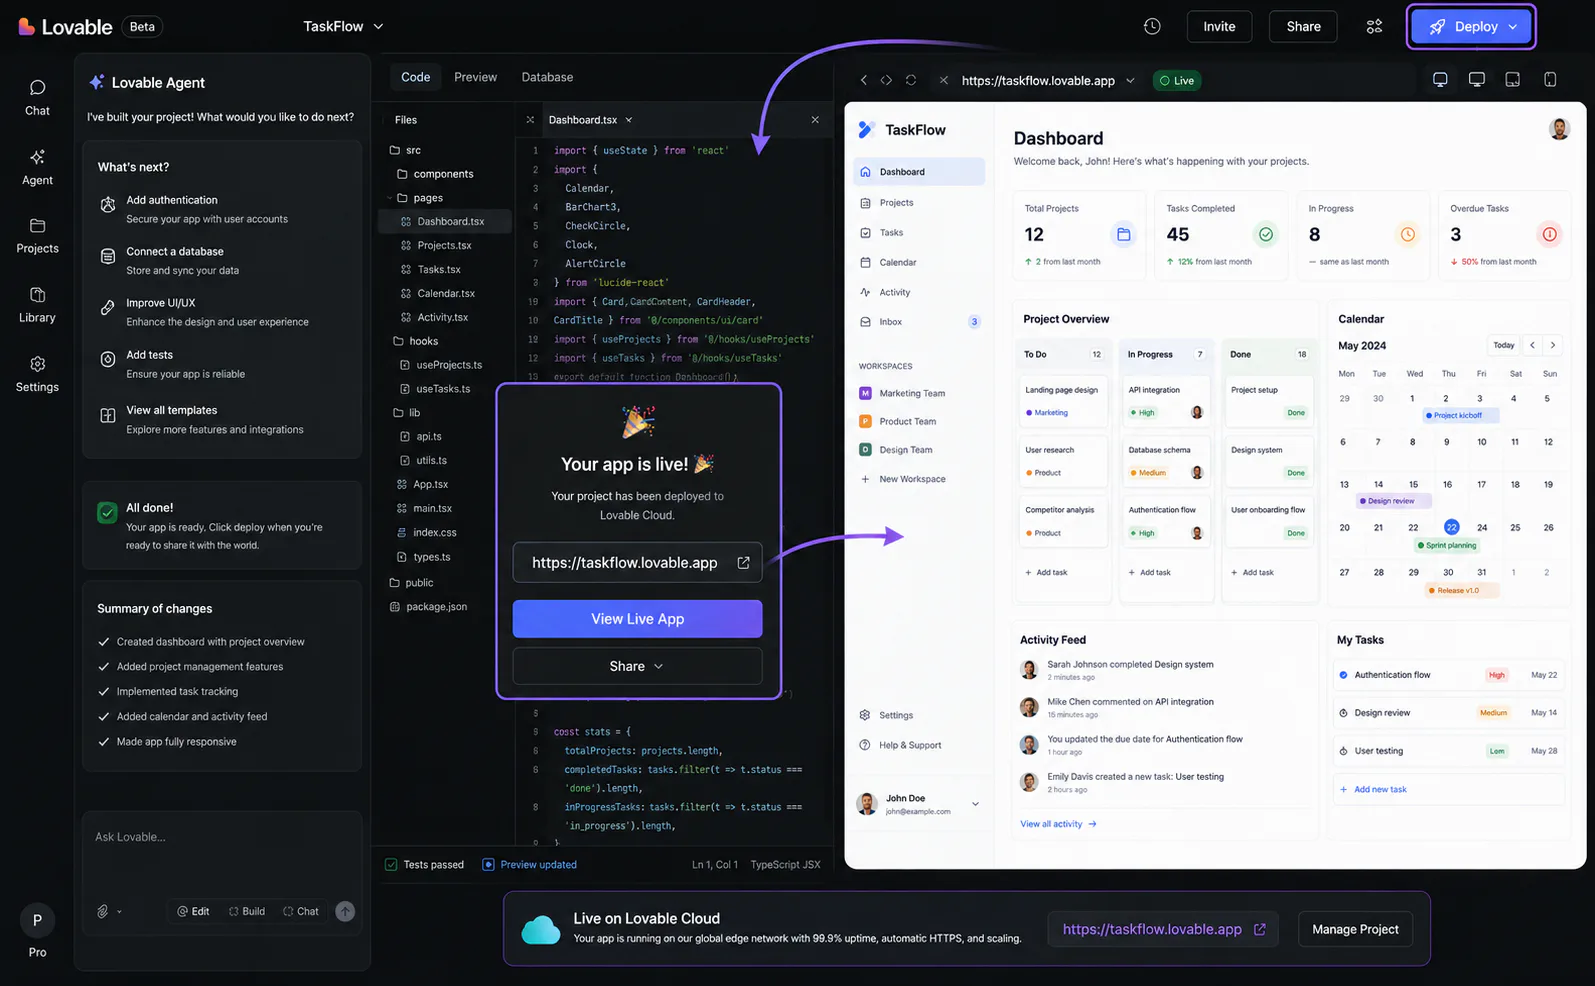
- Deployment: A live URL on Lovable Cloud, available in one click with no server configuration
This is real, exportable code - not a locked-in visual builder. Every project syncs to a GitHub repository you own. You can open it in VS Code, hand it to a developer, or deploy it to Vercel or Netlify yourself.
The platform is built for people who know what they want to build but don't know how to write the code to build it.
Prerequisites
You need:
- A Lovable account (free tier available)
- A clear description of what your app should do - the more specific, the better
- A Supabase account if you want to connect your own database (optional - Lovable provisions one automatically)
- A Stripe account if you need payments
That's the complete list. No local setup. No Node.js installation. No package manager. Lovable runs entirely in your browser.
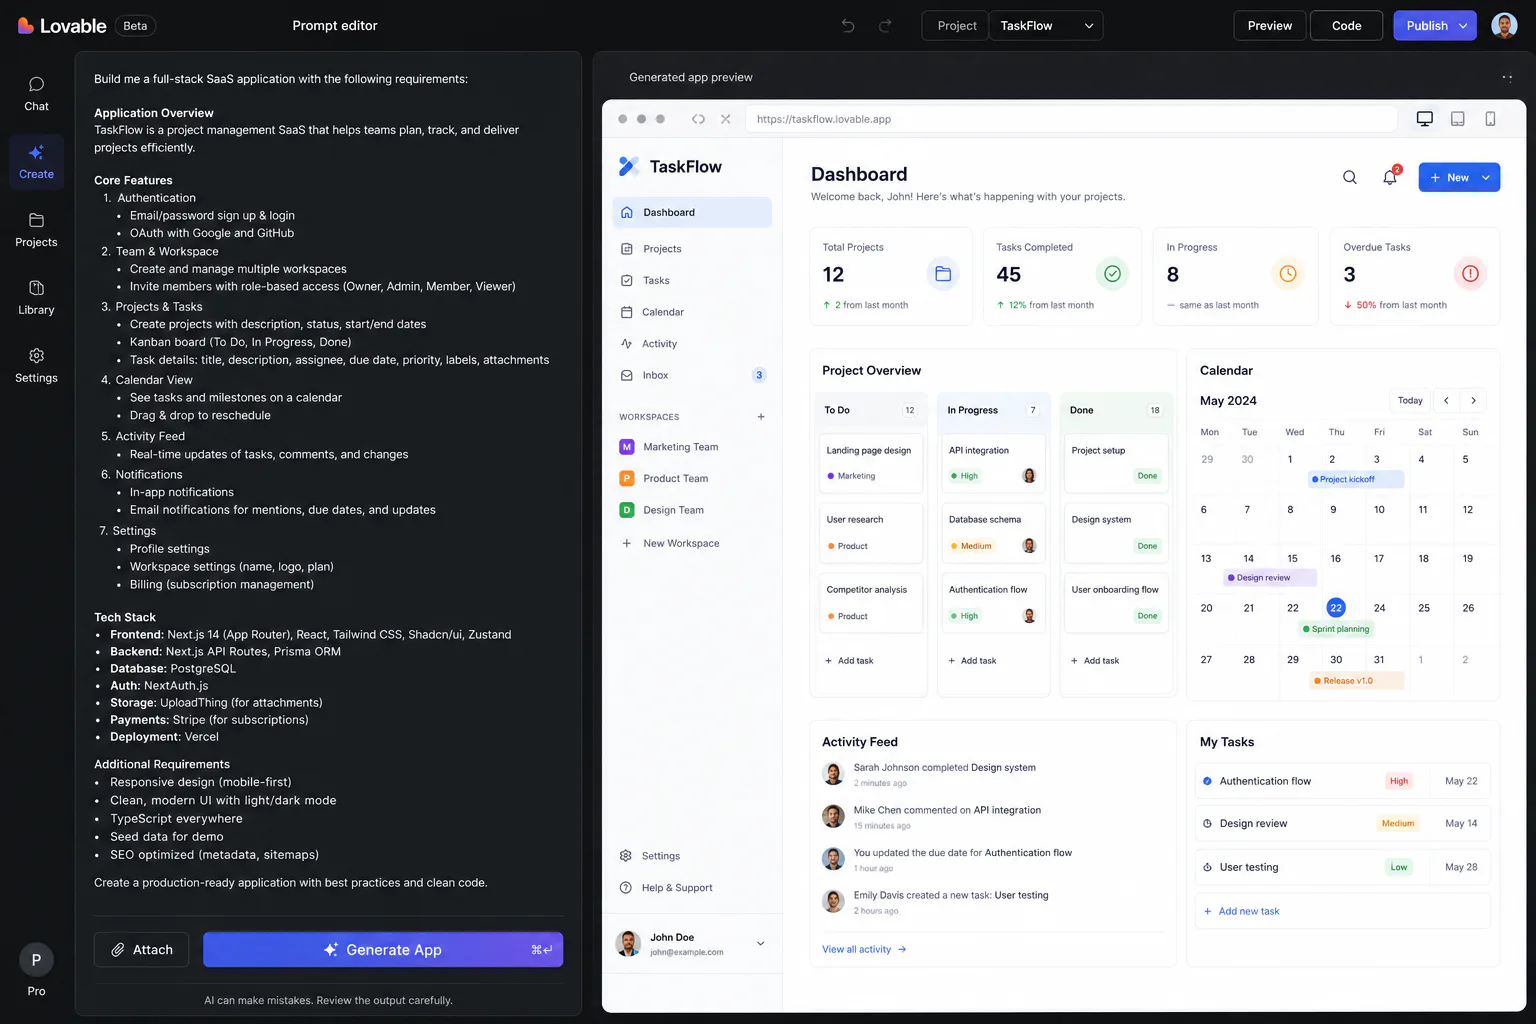
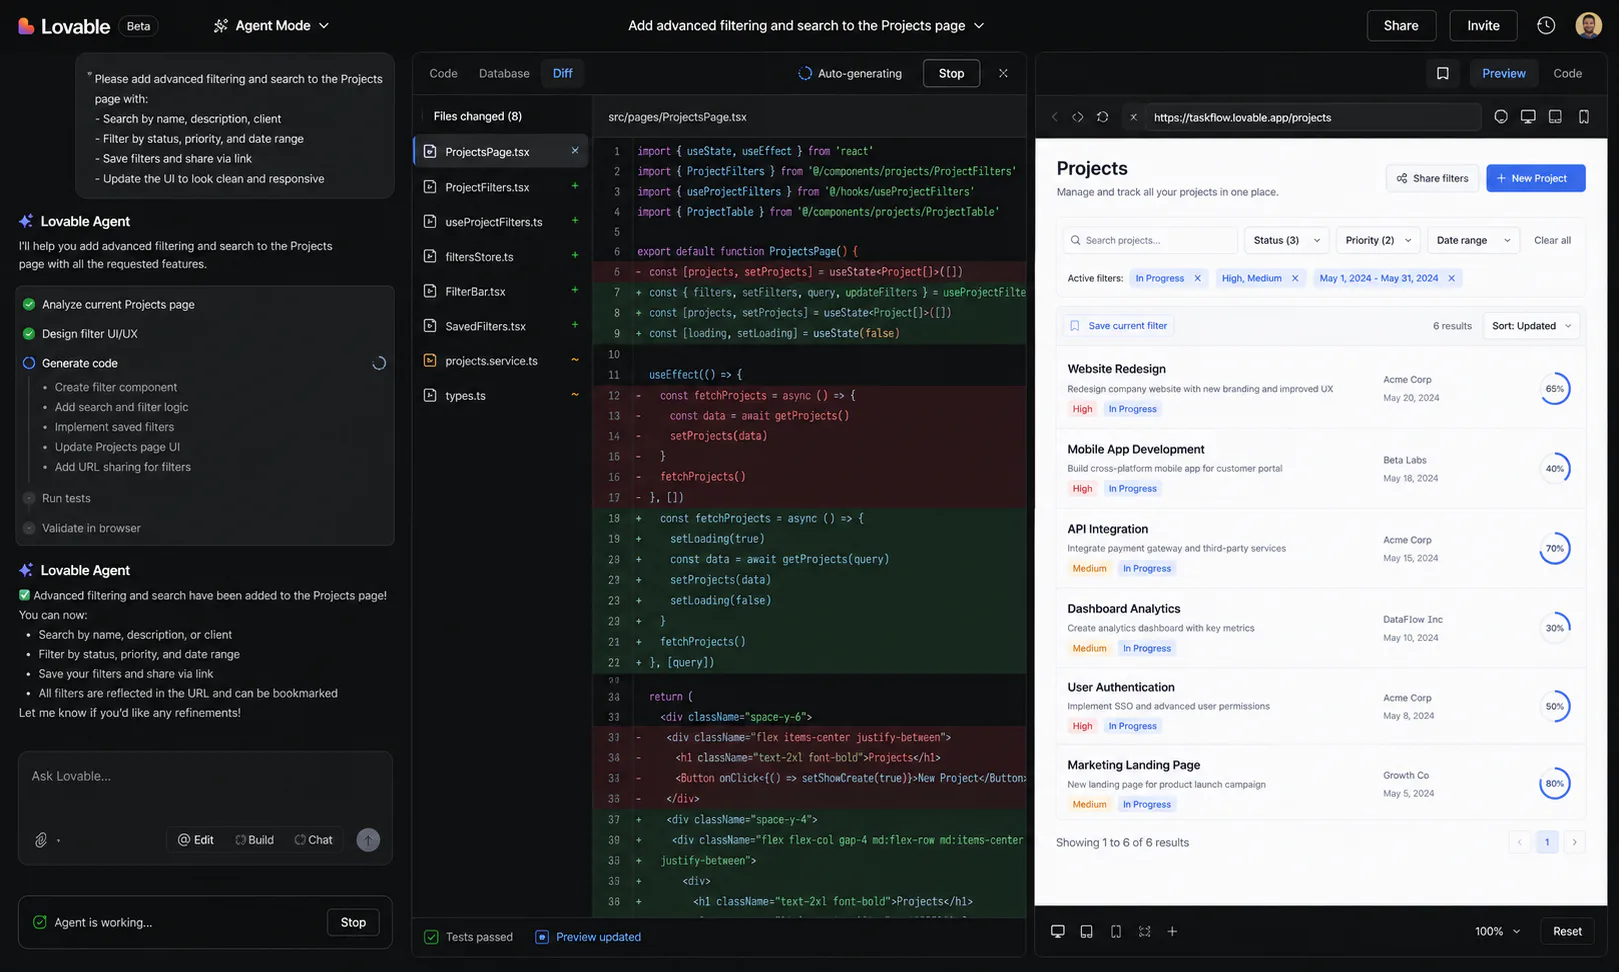
Step 1: Write a prompt that works
The quality of your first prompt determines how much iteration you'll need. Lovable is not a search engine - it performs best when you describe behavior, not keywords.
What a weak prompt looks like:
Build a SaaS appThat tells Lovable nothing about your users, your data model, or what the app does. The result will be a generic template with no business logic.
What a strong prompt looks like:
Build a web app for freelance designers to send client invoices. Users sign up with email and password. Each user has a dashboard showing all their invoices with status (draft, sent, paid). They can create a new invoice by entering the client name, email, line items with descriptions and prices, and a due date. The app calculates the subtotal and total automatically. When they click 'Send Invoice', it marks it as sent. The client receives a public link (no login required) where they can view the invoice and pay via Stripe. Paid invoices update their status automatically.That prompt contains: a user type, a data model (invoices, line items, statuses), authentication requirements, UI structure, business logic, a payment integration, and a public-facing flow. Lovable can generate all of this in a single pass.
Principles for effective prompts:
- Name the type of user and what they need to accomplish
- Describe the data you'll store (users, invoices, products, whatever your domain requires)
- Specify which authentication method you need (email/password, Google, magic link)
- Call out integrations explicitly: "Stripe for payments", "Supabase for the database"
- Describe flows step by step, not just features
A full MVP with moderate complexity takes 150–300 credits total. The initial build of a CRUD app with authentication uses 30–60 credits alone. Use your first prompt well.
Step 2: Choose how the AI builds
Lovable has three modes that serve different stages of development. Understanding them prevents frustration.
Agent Mode: the AI builds on its own
Agent Mode is Lovable's default for feature generation. The AI:
- Reads your prompt and explores the existing codebase
- Formulates an implementation plan
- Writes code, runs tests, and debugs errors - without waiting for you to approve each step
- Runs browser testing: the AI clicks through the finished feature like a real user to verify it behaves correctly
Agent Mode handles most feature requests well. Use it for: building new features from scratch, adding integrations, generating database schemas, or scaffolding complete flows.
Plan Mode: review before anything is written
Plan Mode was added in early 2026 to address one of the most common complaints about AI builders - the tendency to make sweeping changes you didn't ask for.
When you switch to Plan Mode, the AI produces a step-by-step implementation plan before writing any code. You review it, request changes, and approve before generation starts. This is the right mode when:
- You're asking for something that could touch a lot of existing code
- You want to catch misunderstandings before they become bugs
- You're debugging and want to understand the AI's reasoning first
Visual Edits: direct manipulation, no prompts needed
Visual Edits let you click directly on UI elements and modify them: change button text, adjust colors, rearrange layout, update copy. As of Lovable 2.0 (February 2026), this extends to database-connected content - not just static design elements.
Visual edits do not consume AI credits. For minor UI iterations - font sizes, spacing, copy changes, color adjustments - use Visual Edits instead of prompts to preserve your monthly credit allocation.
Step 3: Connect your backend
Every Lovable project automatically provisions a Supabase backend. If you don't bring your own, Lovable creates a managed Supabase instance on your behalf. This handles:
- PostgreSQL database storage
- Authentication (email/password, magic links, OAuth)
- File storage
- Real-time subscriptions (for live-updating UIs)
- Serverless Edge Functions (for server-side logic that can't run in the browser)
Connecting your own Supabase project
If you have an existing Supabase project or want control over your database, connect it through Settings → Connectors → Supabase. You'll need:
- Your Supabase Project URL (found in Project Settings → API)
- Your
anonkey (also in Project Settings → API)
Paste both into the Lovable connector, and all subsequent database operations target your own Supabase project instead of a Lovable-managed one.
How the security model works
Supabase uses two access tiers, and Lovable mirrors this with a Blue Zone / Red Zone model:
Blue Zone (client-safe): The browser uses Supabase's anon key. Row Level Security (RLS) policies - database rules that restrict which rows each user can read or write - protect per-user data. A user can only see their own invoices, not every invoice in the database.
Red Zone (server-only): Sensitive operations - sending emails, charging a card, writing data that requires elevated privileges - run in Supabase Edge Functions using a secret service_role key that never reaches the browser.
The critical detail: RLS is not automatic. You must explicitly ask Lovable to enable it when generating tables that store per-user data. More on this in the security section below.
Step 4: Add authentication
Any app with user accounts needs authentication. Tell Lovable explicitly what kind you need:
Add authentication with email/password signup and login.
Each user should only see their own data.
Lovable generates the complete auth flow: signup form, login form, password reset via email, and the session management logic that keeps users logged in. The phrase "each user should only see their own data" signals to the AI that it needs to apply RLS policies to every table that stores user-specific content.
If you need social login, specify it:
Add Google OAuth login in addition to email/password.Testing authentication works correctly
Once the app generates, test this immediately:
- Create two separate user accounts (use different email addresses)
- Log in as User A and create a record (an invoice, a post, a task - whatever your app stores)
- Log out and log in as User B
- Verify that User B cannot see User A's records
If User B can see User A's data, RLS is not properly configured. Address this before adding any real user data.
Step 5: Add payments with Stripe
For apps that charge users, describe the payment flow in your prompt:
Add Stripe integration. Users on the free plan can create 3 invoices per month.
Users on the Pro plan ($12/month) have unlimited invoices.
Show a pricing page with both plans. Use Stripe Checkout for payment.
Lovable generates: the pricing page, the Stripe Checkout session creation, the webhook handler that listens for successful payments, and the database update that upgrades the user's plan status. The webhook runs in a Supabase Edge Function (Red Zone) so the secret Stripe key never touches client-side code.
Test the payment flow using Stripe's test card: 4242 4242 4242 4242, any future expiry date, and any three-digit CVC. Confirm that a successful payment correctly updates the user's plan in your database before going live.
Step 6: Deploy
When you're ready to go live, click Deploy in the Lovable interface. The app gets a live URL on Lovable Cloud - typically at yourproject.lovable.app.
For a custom domain (yourproduct.com instead of yourproject.lovable.app), you'll need a paid plan:
- Starter (~$20/month) - basic builds, custom domain
- Pro ($25/month) - 100 credits/month + 150 daily credits, custom domain, $25/month Lovable Cloud hosting included
Connect your domain through Settings → Custom Domain, then update your DNS records to point to Lovable Cloud. Propagation typically takes under an hour.
Exporting to GitHub
Every project automatically syncs to GitHub - all code is in a repository you own. To take full control of deployment:
- In Lovable, go to Settings → GitHub and connect your GitHub account
- Every AI-generated change is committed automatically to your repo
- From there, deploy to Vercel, Netlify, Cloudflare Pages, or any static host with a single command
This export path is also how you hand the project to a developer when it outgrows what Lovable can do autonomously.
Step 7: Iterate
After the initial build, most of development is iteration. The effective workflow:
Use Plan Mode for anything touching core business logic. If you're changing how invoices are calculated, how user roles work, or how payments flow, use Plan Mode to review the AI's approach before it rewrites working code.
Use Agent Mode for additive features. Adding a new dashboard widget, a new report, a new integration - these are safe to give directly to Agent Mode without the planning step.
Use Visual Edits for everything cosmetic. Button colors, card layouts, typography, copy changes - these cost zero credits and take seconds in the visual editor.
Commit to GitHub frequently. Since every Lovable change commits to your repo automatically, you have a full version history. If the AI introduces a regression, you can roll back to any prior commit.
What the credit numbers actually mean
Based on community benchmarks from r/indiehackers and Product Hunt:
| Operation | Approximate credit cost |
|---|---|
| Simple styling change | ~0.5 credits |
| New page or view | ~1–2 credits |
| Authentication system | ~1.2 credits |
| Initial CRUD app build | 30–60 credits |
| Full MVP, moderate complexity | 150–300 credits total |
The Pro plan ($25/month) includes 100 credits plus 150 daily credits. For active development, the daily credit refresh matters more than the monthly pool - you get a consistent budget each day rather than burning through a large allocation in one session.
Security: what you must do before going live
This section is not optional reading.
Research from Veracode in 2026 found that 45% of AI-generated code contains security vulnerabilities. An audit of 50 vibe-coded apps across major platforms found that 88% had Supabase Row Level Security completely disabled - not misconfigured, but switched off. These vulnerabilities are invisible in demos and previews, which is exactly why they persist.
Lovable operates under a Shared Responsibility Model. The platform secures the infrastructure. You are responsible for the security of the application you build on it. Lovable's SOC 2 Type 2 certification covers Lovable's servers - it does not cover your app.
The four checks before going live
1. Verify RLS is enabled on every table that stores user data.
In your Supabase dashboard, go to Table Editor, select each table, and confirm Row Level Security is enabled. Then check that policies exist for SELECT, INSERT, UPDATE, and DELETE. If a table has RLS enabled but no policies, no one can read from it. If a table has RLS disabled, any authenticated user can read every row.
To add RLS via Lovable, use this prompt pattern:
Enable Row Level Security on the [table name] table.
Users should only be able to read, create, update, and delete their own rows.
2. Scan for exposed secrets.
Run gitleaks on your exported codebase before deploying. Lovable generates Edge Functions for server-side operations specifically to keep secrets out of client-side code - but verify this yourself. An API key in a client-side bundle can be extracted by any visitor to your site.
# After exporting your codebase to GitHub
gitleaks detect --source . --verbose
3. Test authorization as a second user.
Create two test accounts. Log in as User A, create records. Log in as User B, and manually attempt to access User A's data via both the UI and direct Supabase API calls. If User B can reach User A's records, your RLS policies are incomplete.
4. If you handle payments, test Stripe webhooks.
Use the Stripe CLI to forward webhook events to your local environment and confirm every event type (payment succeeded, subscription cancelled, payment failed) correctly updates user status in your database.
The April 2026 incident
Lovable experienced a security regression in 2026 that re-enabled public read access to chat histories and source code on public projects. It remained active from February 3 to April 20 - 77 days. Multiple HackerOne reports were incorrectly closed. Free-tier users, where all projects are public by default, were most exposed.
The lesson: do not store anything in your Lovable project that you're not comfortable being public until you've verified your project visibility settings. Go to Settings → Project Visibility and confirm your project is set to Private if you're handling confidential data.
Lovable has since overhauled its security triage process and is undergoing ISO 27001 re-certification. Security Checker 2.0, launched August 2025, now scans projects automatically for exposed secrets, database misconfigurations, and sensitive data exposure - blocking approximately 1,000 rule-breaking projects daily.
What Lovable can't do
Being clear about the ceiling saves you significant frustration.
Lovable generates web apps only. There is no iOS or Android native app output. If you need a mobile app, Bolt.new (with Expo integration) or a dedicated mobile-first builder is the right tool.
The backend is Supabase, exclusively. If your requirements demand a different database engine, a Python backend, a Laravel API, or on-premises data storage, Lovable is not the right fit. Export your codebase and continue development with a developer.
Complex business logic has a ceiling. Deeply nested state machines, custom algorithmic implementations, and highly specific edge case handling can produce inconsistent results. The AI handles 90% of typical app logic well; the remaining 10% of unusual requirements may need developer intervention.
Very large projects degrade over time. As a project accumulates hundreds of prompts, the AI's ability to maintain full context across all prior decisions weakens. Contradictory edits, regressions in earlier features, and inconsistencies in naming conventions are symptoms of context window saturation. The mitigation: export to GitHub regularly and bring a developer in when the project reaches this stage.
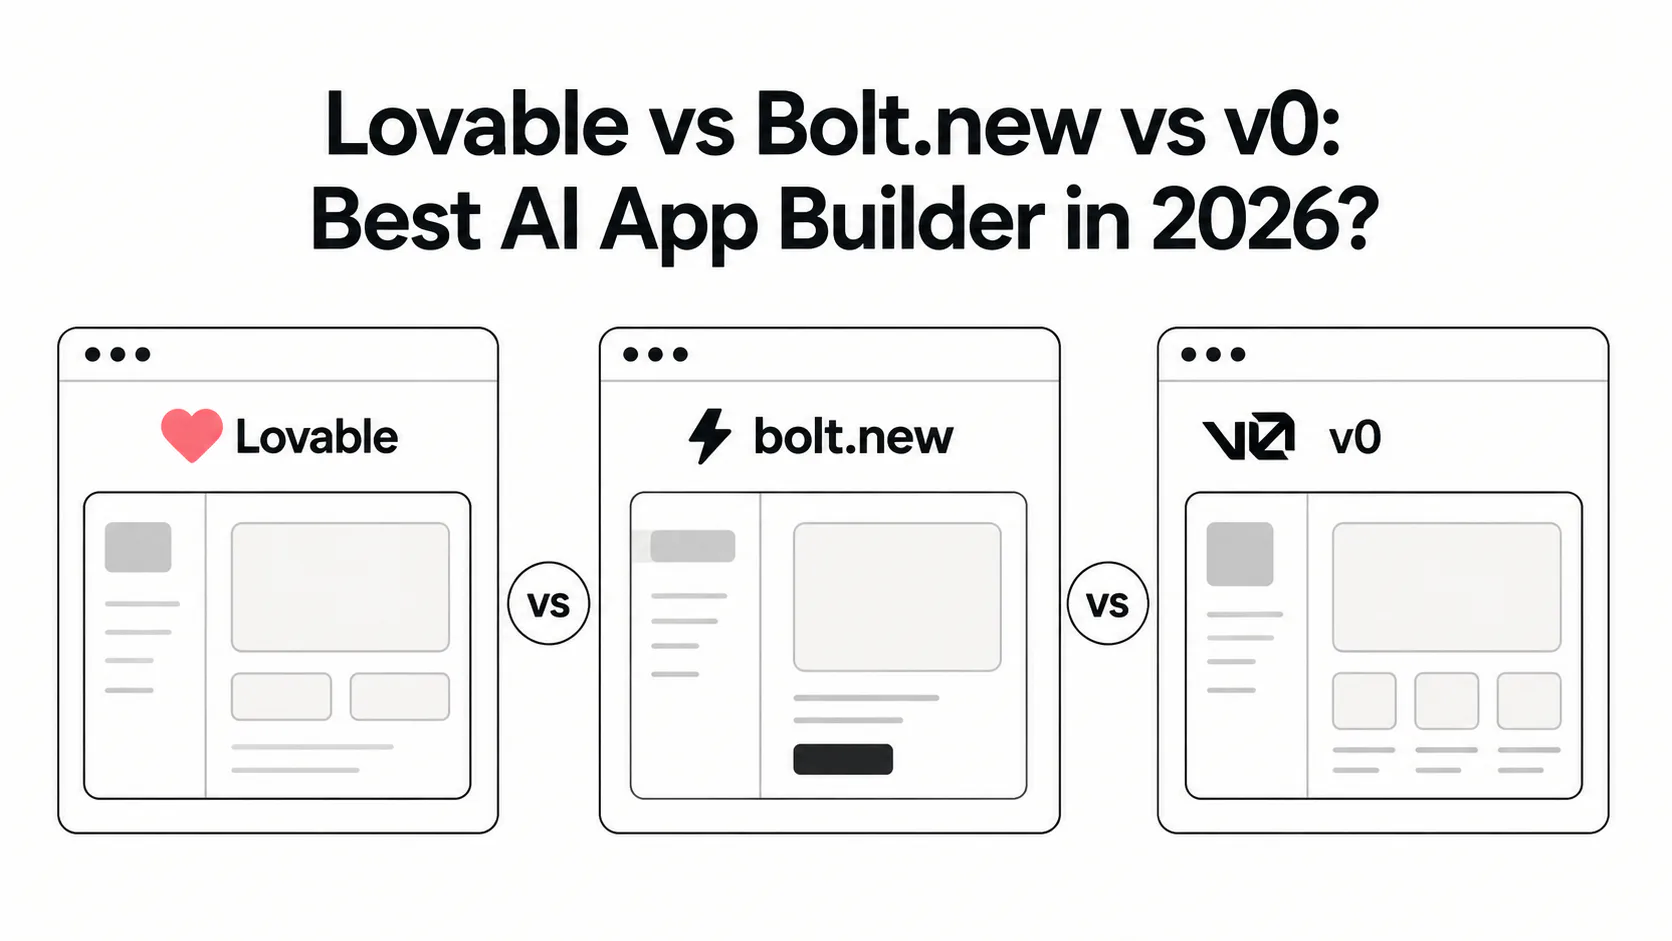
For a broader comparison of Lovable against Bolt.new and v0 on architecture, pricing, and output quality, see our Lovable vs Bolt vs v0 comparison. Browse more no-code and builder guides in our other tools category.
Key takeaways
Lovable is the fastest path from a product idea to a working, deployed full-stack application - for people who don't write code. The combination of React + Supabase + one-click deployment, all controlled through plain-English conversation, is genuinely distinct from anything else in the market.
It has a real ceiling: Supabase lock-in, credit unpredictability on complex projects, and a security model that puts meaningful responsibility on the builder. None of those ceilings matter if you use it for what it's designed for - validating ideas, shipping MVPs, and building internal tools where a developer handoff isn't an option.
Read the security section, verify your RLS policies, and don't put sensitive data in public projects. Do those things, and Lovable is one of the most productive tools available for builders in 2026.
Frequently asked questions
Lovable has a free tier with limited builds on a public subdomain. The Starter plan runs ~$20/month with custom domain support. The Pro plan is $25/month and includes 100 credits plus 150 daily credits, plus a $25/month Lovable Cloud hosting allowance. The Business plan ($50/month) adds team collaboration. Credit consumption is variable: simple changes cost under one credit; a full MVP initial build typically uses 150–300 credits. Verify current pricing at lovable.dev before committing.
Lovable is SOC 2 Type 2 and ISO 27001:2022 certified at the platform level. Your application's security depends on how you configure it. Before going live with real users, you must verify that Supabase Row Level Security is enabled on every table that stores user data, scan your exported codebase for exposed API keys, and test that users cannot access each other's data. Lovable's certification covers their infrastructure - not the application you build on it.
Yes. Every Lovable project syncs automatically to a GitHub repository you own. You can deploy the exported codebase to Vercel, Netlify, Cloudflare Pages, or any static host. The Supabase backend is also portable - you can connect your own Supabase project from the start, or migrate to a self-hosted Supabase instance after export. Lovable does not lock your code inside the platform.